
In this article, we will discuss effective methods for ensuring optimal EMOVE Cruiser maintenance, so you can keep it in excellent condition. As the Cruiser is renowned for its ability to handle long rides, it's natural for components to shift and loosen over time. Therefore, it is necessary to inspect and secure all parts regularly to guarantee a smooth and hassle-free ride.
Kindly be aware that the video tutorial showcases the previous version of the EMOVE Cruiser, which bears a striking resemblance to the current EMOVE Cruiser S model while incorporating several enhancements. Nonetheless, the techniques demonstrated in the tutorial are applicable to both the older and newer models.
Common Electric Scooter Problems on the EMOVE Cruiser
Let's discuss the regular EMOVE Cruiser maintenance tasks required, moving from the front to the back of the scooter. This includes taking care of the handlebars, folding mechanism, and small accessories. Finally, we will cover how to tune both the front and rear brakes.
Maintenance Tip #1: How to Use the Screw Catalog
A common complaint from EMOVE Cruiser scooter owners is that they lose the screws essential to keeping the folding mechanism and stem in place. The bolts in other locations along the body can also become loose. Oftentimes, bolts and component parts loosen from vibrations during riding, as well as general wear and tear.
Our advice is to regularly check all screws and bolts along the scooter’s body before riding. If you ride just a few miles every day at low to moderate speed, you may only need to check these screws weekly. If you regularly commute on your EMOVE Cruiser for longer-range rides with higher speed, varied terrain and stops and starts, you may want to inspect your scooter before each ride to ensure your safety.

VoroMotors provides visual maps of what size screws fit where in our EMOVE Cruiser Screw Catalog. If any have gone missing, you can check which screw sizes you need and purchase them locally from a hardware store or bike repair shop. If you don’t mind a brief wait, you can add the screws you need to the cart directly from the catalog page. We sell the screws in a pack, so you’ll often have spares for future repairs.
Maintenance Tip #2: How to Fix Wobbly Handlebars

The handlebars on the EMOVE Cruiser have a pull-release mechanism, so they can be folded down for compact transport. Initially, you may notice a slight looseness in the handlebars themselves, which can be quite bothersome when encountering bumps and other uneven surfaces.
To address this issue, let's start by focusing on the handlebar's top right side. Firmly grip the center part of the handlebar and then gently push the black cap, marked with a white arrow pointing outward. Simultaneously, exert downward pressure to fold the handlebar. As a result, you will expose a tiny silver screw on the inside that can be adjusted.

In this case, the goal is not to tighten the screw but rather to loosen it. Using a 2.5 mm allen wrench, ensure that the screw fills the space on top. If you tighten the screw, it will create more space in the socket, resulting in increased play or looseness. Therefore, it is essential to loosen the screw slightly to fill the gap. It might require a few attempts to get it right, so try loosening it, unfolding it, and checking for play. Please exercise caution with the screw as it can easily strip, particularly if excessive force is applied while attempting to tighten it. If both handlebars feel loose, repeat the process on the other handlebar until both feel secure.
Maintenance Tip #3: How to Align the Handlebars

At times, you may notice that your handlebars become misaligned, causing the wheel to face forward while the handlebars are slightly off-center. To begin the adjustment process, locate the small stem clamp on the neck of the scooter. By releasing it, you can raise or lower the handlebars to the desired position. Brace yourself on a chair or wall, and stand with both feet on the deck to determine what handlebar height works best for you. Remember to lock it securely once you've made the adjustment.

To straighten the handlebars, stand in front of the scooter and firmly grip the front tire between your feet. Unlock the clamp on the stem of the handlebars again, and twist it until the handlebars are centered over the front wheel. Once straightened, lock the stem clamp to secure the position. If the clamp does not feel taut, unlock the latch, and tighten the small black nut by turning clockwise. When tightened, the handlebars should be securely locked in place, straight over the wheel, without any wobbling. By following these steps, you will achieve a comfortable height and straight alignment for your handlebars.
Maintenance Tip #4: How to Tighten the Headlight and Horn

Moving on, let's focus on the front lamp, which has an electronic horn built-in. Occasionally, you may notice your headlight is wobbling, but don't worry, as it's a straightforward issue to resolve. Using a 8 mm wrench, tighten the silver bolt mounting the headlight to the frame, and you'll quickly have it secured and ready for use.
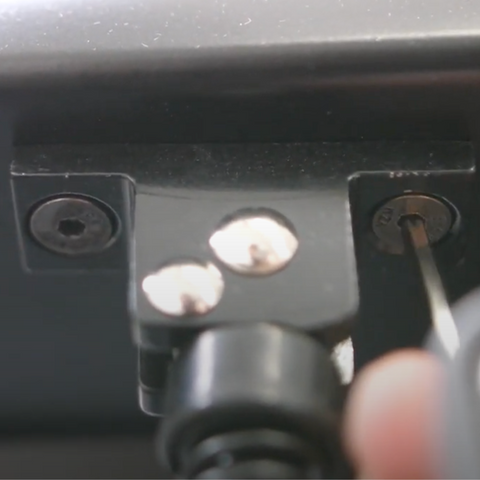
Maintenance Tip #5: How to Fix a Wobbly Stem on the EMOVE Cruiser

Let's address the issue of a wobbly stem on your electric scooter. Although it can be quite annoying, the good news is that it's a relatively simple problem to fix. Start by locating the folding mechanism, situated at the neck of the scooter. You'll notice six small screws there. Tighten all of the screws using 4 mm and 5 mm hex keys. Additionally, tighten the larger bolt at the bottom of the mechanism. You'll need an allen wrench on one side and a 10 mm wrench on the other to securely tighten it. Please do not overtighten these components, as they are essential for the scooter's folding functionality. However, we also want to ensure they are not wobbly while riding.

If the issue persists, you'll need to focus on the area beneath the stem. Look underneath, and you'll find a few screws on the underside of the stem. These may require tightening as well, using a 6 mm allen wrench. Unfortunately, accessing them can be challenging as there’s little space to work with unless you remove the front fender. Consider purchasing an allen wrench with a long shaft to reach those screws. Alternatively, you can remove the fender for easier access. While it may require some effort, it is a manageable fix.
Maintenance Tip #6: How to Fix a Loose Kickstand on the EMOVE Cruiser
If your kickstand is loose, you can easily repair it. Use a 5 mm allen key to tighten the black screws that secure the kickstand to the deck. Try folding and unfolding the kickstand to ensure that everything is tight, and that the screws are not stripped. Keep in mind that the kickstand is made of plastic and excessive force may result in snapping or damage.
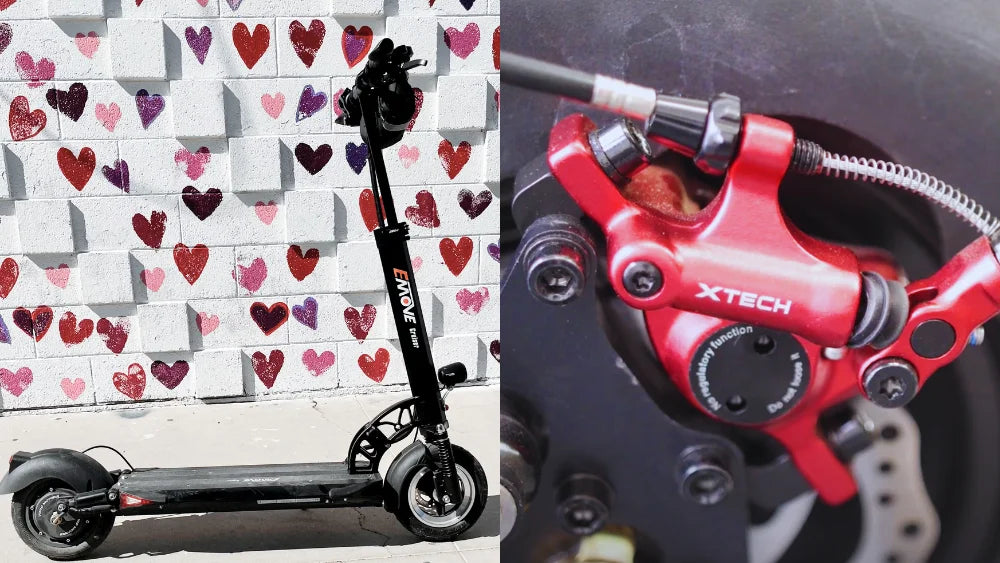
Maintenance Tip #7: How to Tune Disc Brakes on the EMOVE Cruiser
Keeping your brakes in good condition is important for your safety and the scooter’s longevity. As tuning the front and rear brakes is a bit of a process, we have broken it into detailed sections, providing step-by-step guidance. To ensure smooth rotation of the wheels and strong operation of the brakes, it is essential to follow these steps.
Let’s start with how to tune the front brakes on an electric scooter. This demonstration is with the EMOVE Cruiser, which has cable-actuated semi-hydraulic disc brakes, but applies to scooter brakes of similar styles.

- Start by loosening the bottom mounting bolt on the brake caliper, followed by loosening the top mounting bolt.
- Once the caliper is loose, gently wiggle it from left to right, and ensure it is centered on the rotor. Expert Tip: Hold down on the right brake lever, which operates the front brake, while the caliper is free to center the rotor between the pads.
- Align the brake pads at an even distance from the brake disc, ensuring proper positioning. This will help you avoid excessive grinding on either side of the brake rotor.
- Finally, tighten both the bottom and top mounting bolts securely and spin the wheel to check for noises and to ensure the brake pads are making contact with the rotor when engaged.
If you encounter a new sound, indicating the brake unit is grinding against the metal inside the wheel, you may need to repeat the tuning process. It's important to note that there may still be a slight grind initially due to the new brake pad, but this should diminish after a few rides.
The same approach applies when handling the rear brake. It is worth noting that the rear wheel may not spin as freely as the front wheel due to the presence of the motor. Therefore, a trained ear is required to identify any grinding sounds, as they may not be as pronounced as in the front wheel. To address this, proceed with loosening both the bottom and top nuts, make the necessary adjustments to the brake disc, and securely tighten them afterwards.
Another issue you may encounter is when the brakes lack sufficient grip against the rotor when the levers are squeezed. This can be a safety hazard, as that means the brake pads are too far from the rotor to make contact based on the pressure applied to the levers. To address this, follow these steps:

- Loosen the top adjuster screw on the brake caliper with the 5 mm hex key. This allows you to pull the cable tighter.
- Hold the caliper arm and pull the brake line through to increase the tension.
- Tighten the adjuster screw and test the brake response by spinning the wheel, and pulling on the right brake lever.
- If the braking response is as desired with minimal noise, use the 5 mm hex key to secure the adjuster screw tightly.
Keep in mind that fine-tuning your scooter’s brakes, making repairs and adjustments will require some trial and error to achieve the desired feel. It's essential to make sure your scooter brakes feel comfortable and respond well when engaged.

Additionally, you have the option to fine-tune the brake sensitivity using the small rough-edged knob and hand tightening. By rotating it clockwise or counterclockwise, you can make subtle adjustments to the braking response without the need for tools.

Now, let's discuss an alternative method for adjusting the brakes, known as the "lazy man" method, if you prefer not to make adjustments to the brake caliper. This demonstration is for the rear brakes or left brake lever. Located where the cable enters the brake lever, there is a lock nut with an inner screw or bolt.
- Loosen the lock nut by turning it clockwise. Now that it can move freely, you can reach the inner bolt.
- Tighten the inner bolt by turning it counterclockwise, then tighten the lock nut down to secure.
- The bolt will seat itself further into the brake lever the more you turn it. If the bolt is seated close to the lever, the brakes will feel looser or less touchy. Conversely, the further the inner bolt is positioned from the lever, the tighter or more responsive the brakes will feel.
- Test out what response works best for you by adjusting the lock nut and bolt, pulling on the lever, and repeating the process until you’ve achieved your desired braking feel.
- When everything feels satisfactory on both levers, securely tighten the lock nuts and bolts to complete the repair.
Conclusion
That covers basic maintenance for addressing some of the issues that arise from regular wear and tear of your EMOVE Cruiser scooter. If you come across any broken or missing screws or parts, please don't hesitate to contact us. On the other hand, we’re also here to help with repair services as needed. We hope this information has been helpful, and enjoy your ride!