

Table of Contents
- Overview of the EMOVE RoadRunner Electric Scooter for Adults with Seat
- Unbox and Set Up Your EMOVE RoadRunner Seated Electric Scooter
- What's Included in the EMOVE RoadRunner Box
- EMOVE RoadRunner Seated Electric Scooter Quick Setup
- How to Install the Handlebars
- How to Adjust the Brake Levers and LCD Display
- How to Install the Foot Pegs
- How to Remove and Charge the Battery
- How to Read the LCD Display
- EMOVE RoadRunner Seated Electric Scooter Maintenance
Are you the proud new owner of the EMOVE RoadRunner seated electric scooter? In this article, we aim to showcase not only the outstanding features of the EMOVE RoadRunner V2 – an exceptional seated electric scooter that doesn't break the bank – but also valuable advice on scooter maintenance to ensure it stands the test of time.
For those seeking a reliable, comfortable, and high-performing personal transportation solution, the EMOVE RoadRunner stands as an unbeatable option priced under $1500. It's a beautiful fusion of style, comfort, and power, making it a perfect companion for your daily commutes or weekend adventures.
However, owning a scooter doesn't end with the purchase. To keep your ride smooth and safe, regular maintenance and a good understanding of your scooter's workings are crucial. This guide will serve as your one-stop source for all necessary scooter maintenance tips and tutorials. From scooter components replacements to safety checks, we've got you covered. So, buckle up, riders! Read on to discover how to make the most out of your new scooter!
Overview of the EMOVE RoadRunner Electric Scooter for Adults with Seat
The EMOVE RoadRunner V2 maintains all the fantastic features that made the original model renowned. Equipped with dual hub motors, the RoadRunner V2 doesn't shy away from power. With a top speed of 34 mph and an impressive range of over 100 miles (possible with a battery swap), this electric scooter for adults with seat is ready to take you wherever your heart desires, whether it's commuting to work, exploring the city, or running errands. The RoadRunner V2 ensures a stylish, comfortable, and seamless ride.
Moreover, this new version brings even more to the table. It features Xtech hydraulic brakes for reliable stopping power, a super bright front headlight for excellent visibility during night rides, and a swappable battery for doubling your travel distance. With adjustable suspension accessible with the turn of a knob, you can customize the resistance to your comfort level.
Additionally, VoroMotors has made significant upgrades to the seat on the RoadRunner V2. Departing from the original small plush design, the new scooter now comes with a thick, heat-resistant memory foam seat, similar to the one on the EMOVE RoadRunner Pro. Your back and bottom will undoubtedly thank you for this improvement! Another key upgrade from the original model is the transition from tube tires to tubeless ones. The new tubeless tires are easier to maintain and significantly less susceptible to flats. Furthermore, the new thumb throttle is crafted for enhanced durability, faster response time, and a more comfortable grip. This upgrade ensures a smoother, more controlled ride every single time!
Unbox and Set Up Your EMOVE RoadRunner Seated Electric Scooter
Unboxing a new EMOVE RoadRunner seated electric scooter is an experience brimming with anticipation and exhilaration. As you carefully open the box, a wave of excitement washes over you, heightened by the sight of your sleek, new electric scooter nestled inside!
What's Included in the EMOVE RoadRunner Box
Upon opening your EMOVE RoadRunner box, you will find everything needed to get you started with your new electric scooter. The package includes:
-
EMOVE RoadRunner electric scooter
-
Multitool
-
EMOVE RoadRunner digital user manual QR code
-
48V 3A charger
-
Rubber foot peg covers (2)
-
Motor rubber covers (2)
EMOVE RoadRunner Seated Electric Scooter Quick Setup
Let's get your new scooter ready! The setup is a breeze with just a few easy assemblies. Follow the simple steps below, and you'll be up and riding in no time.
How to Install the Handlebars
The first step in assembling your scooter is installing the handlebars. Before removing the RoadRunner from the box, position the handlebars in their designated slot. Then, lift the 55 lbs electric scooter out of the box using both hands.
-
In the middle of the handlebars, fold and secure the latch in place by locking it down.
-
Next, remove the small rubber piece from the slot where you insert the handlebars.
-
Using the largest allen key provided, tighten the bolt inside. Once you feel resistance, give it one last tighten and then cover it with the rubber piece. This ensures the handlebars stay securely in place while riding.
How to Adjust the Brake Levers and LCD Display
-
Using the second-largest allen key, tighten the screws on both brake levers to adjust them.
-
Once the brake levers are secured, move on to adjust the LCD display. Take the allen key and tighten the screw located underneath the LCD.
How to Install the Foot Pegs
-
Slide the rubber foot peg covers onto the ends of the pegs and tighten them securely by hand. Ensure they are tight and stable, as they provide essential grip to prevent your foot from slipping off while riding.
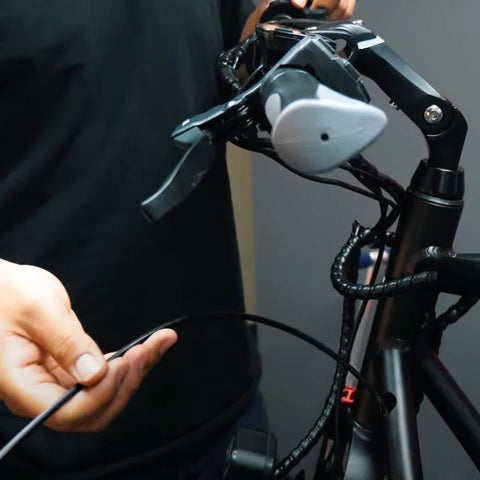
How to Remove and Charge the Battery
The EMOVE RoadRunner makes it easy to remove and charge the 48V 26.1Ah battery.
-
Insert the key into the keyhole and turn it to the right to release the battery. Gently slide the battery out.
-
For charging, fully remove the battery, plug in your charger, and connect it to an outlet.
-
When the scooter is charging, the indicator light on the charger will glow red. When the scooter is done charging, the indicator light on the charger will glow green.
-
When the battery is full, be sure to remove the charger immediately.
-
For optimum safety, we recommend that you never charge your scooter unattended, like charging it overnight while you're asleep.
How to Read the LCD Display
Once your scooter is fully charged, power it on to view the LCD display. Here, you'll find important information, including the battery indicator, speed, gear level, and total mileage.
-
To power on the electric scooter, simply hold the power button.
-
Press the 'M' button to switch between speed modes: (1) Low speed, (2) Medium speed, (3) Top speed.
EMOVE RoadRunner Seated Electric Scooter Maintenance
Electric scooter maintenance is important for its overall performance, lifespan, and user safety. Regular maintenance checks not only ensure that your scooter remains in prime condition but also help in early detection of potential issues that could escalate over time.
How to Replace the Brakes
This section will provide an easy-to-follow guide on how to replace the brakes of the EMOVE RoadRunner. It encompasses the replacement of rear and front brake calipers, brake levers, and brake lines. The guide is split into sections for each part of the braking system to ensure the instructions are clear and easy to understand.
Tools
-
5 mm hex key
-
3 mm hex key
-
Electrical tape
-
String (or brake line)
-
Pin tools
-
Scissors
-
Gloves
-
Replacement parts (brake calipers, brake levers or brake lines)
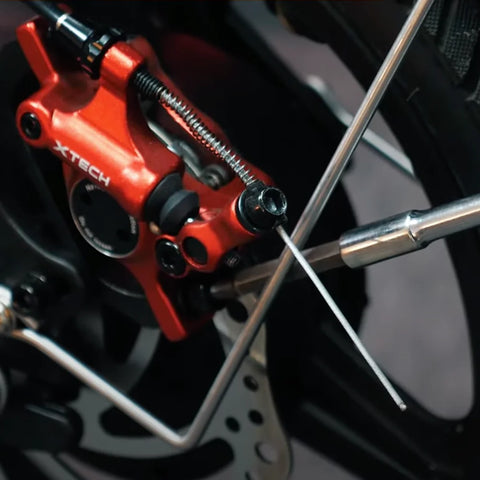
Rear Brake Caliper Replacement
-
Start at the caliper, using the 5 mm hex key to loosen the grip on the brake line.
-
Use pliers to remove the metal cap at the end of the line.
-
Unscrew the two screws holding the caliper using the 5 mm hex key.
-
Pull the caliper away from the body to expose the brake line.
-
Install the new brake caliper by feeding the line through its opening.
-
Secure the new caliper by screwing it back in with the 5 mm hex key.
-
Thread the line through the tension piece and set the tension using your fingers. Tighten down the tension with the hex key.
-
If the tension piece falls off, ensure you have both pieces and screw them back on.
-
Slide the metal pin back to the end of the line and pinch it with pliers.
-
To adjust the caliper, slightly unscrew it, grip the lever until the brake wraps around the rotor, then tighten the screws and release the caliper.
-
For further adjustment, loosen the caliper and put the wheel in a free spin. Tape the throttle to maintain a steady speed. As the wheel turns, gently adjust the caliper until no sounds come from the rotor.
Front Brake Caliper Replacement
-
The steps for the front brake caliper replacement are identical to the rear brake caliper replacement. Follow steps 1-11 above.
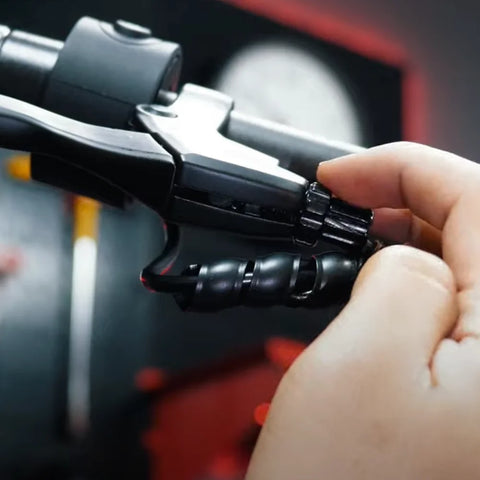
Front Brake Lever Replacement
-
Locate the brake line at the lever and reveal it by unscrewing the screws threaded into the lever.
-
Pull back the line while gripping the lever and lift the bulbous portion out of the lever once it's exposed.
-
Twist and remove the handlebar grip. Wearing gloves will make this process easier.
-
Now, remove the rubber covering the screw and use the 3 mm hex key to unscrew the throttle and slide it off.
-
Unravel the wire cover and follow the line into the seat.
-
Remove the seat by unscrewing all four screws using the 5 mm hex key.
-
Look for two lines with blue and red cords with black connectors going into black connectors with white and black cords within the unraveled wires.
-
Choose your new lever and grip it down while unplugging one of the connectors. The correct line will turn off the rear light when unplugged.
-
Use your pin tool to push the pins out of the connector hall.
-
Take the exposed pins, tie them together with a string, and pull the string through the scooter until the line emerges on the other end. Then, untie the string.
-
Slide the old lever off and install your new brake lever.
-
Tie the string onto the new brake line and thread it through the scooter body to the controllers.
-
Use your pin tool to insert the pins into the black connector. Connect the connector holes.
-
Organize all the wires inside, place the seat back on, and secure it with the four screws using the 5 mm hex key.
-
Wire the brake line back into the lever. Turn the screws until the opening is clear, place the line through, and insert the bulbous portion into the lever. Fasten the lever screw to secure the line.
-
Check the brake functionality on the caliper. If it's working, slide the throttle on, followed by the handlebar grip.
-
Use the 5 mm hex key to tighten the lever to the handlebar and the 3 mm hex key to tighten the throttle.
-
Finally, replace the wire cover, starting at the point where the line emerges from the scooter body.
Rear Brake Lever Replacement
-
The process for replacing the rear brake lever is identical to the front brake lever replacement. Follow steps 1-18 above.
Brake Line Replacement
-
For both front and rear brake lines, begin by loosening the grip on the brake line at the caliper using the 5 mm hex key. Then, use pliers to remove the metal cap at the end of the line.
-
Go to the brake lever and expose the brake line by turning the screws threaded into the lever. Pull the line back as you grip the lever and lift the bulbous portion out of the lever once it's exposed.
-
Unwind the wire covers and set them aside.
-
Tie a string to the bulbous end of the line. At the caliper end, remove the line from the guides along the scooter body.
-
Pull the line through the scooter body, so it emerges at the rear. Untie the string from the old line and tie it to the same position on your new brake line.
-
Thread the new brake line through the scooter by pulling on the string and guiding the line.
-
Guide the new wire through the scooter's body and up to the lever.
-
Thread the new brake line back into the lever and turn the screws until the opening is clear.
-
Insert the bulbous portion of the new line into the lever and fasten the lever screw to keep the line in place.
-
Insert the line into the caliper and tighten the tension piece using your fingers. Then, securely tighten the caliper screws with the 5 mm hex key.
How to Replace the Front Motor
Over time, due to constant wear and tear, the front motor may become less efficient or even malfunction. In such cases, you will need to replace the front motor to ensure a smooth and safe ride.
Tools
-
5 mm hex key
-
4 mm hex key
-
18 mm socket wrench
-
Electrical tape
-
String
-
Pin tools
-
Spoon tool (2)
-
Scissors
-
Gloves
-
New front motor
Steps
-
Use the 5 mm hex key to unscrew the four screws under the seat. Once unscrewed, lift the seat up and hang it off to the side. Make sure to wear gloves around the electric components for safety reasons.
-
Cut the zip tie holding the wires together and unpack the contents.
-
Locate the front controller and unplug the motor wires in the motor hall. Take a photo of the motor hall and cables before disconnecting for reference.
-
Using the pin tool, remove the pins out of the motor hall one at a time.
-
After removing the pins, cover them with a plastic sheath.
-
Tie the wires together to the motor hall cables using a string. The string will help with routing the new motor wire later.
-
Bundle the wires together using electrical tape.
-
Cut the zip ties holding the motor wires along the frame and unwind the wire. Place the wire cover to the side for later.
-
Now, take the wire at the front and pull it out. If the string ever falls out, you can use the brake line to push the wires through.
-
Cut the excess string on the end that you tied to the cables, leaving enough to tie the new motor.
-
Remove the tape and string from the wires.
-
Use the 5 mm hex key to unscrew the brake caliper and let it hang off to the side.
-
Use the 18 mm socket wrench to unscrew the motor bolts. Be careful as the scooter's weight balance will change after removing the wheel. Be ready to catch the wheel once it's free.
-
Bring the front wheel to a workstation and remove the disc rotor using the 4 mm hex key.
-
Use a screwdriver to remove excess air from the inner tube to assist with the next steps. You can also spray the rim with water to further assist with removal.
-
Place your spoon tools along the same side and move them in the opposite direction until the tire emerges over the rim.
-
Be careful not to damage the air valve as the tire comes off.
-
Now it's time to place on your new motor. Deflate the inner tube even further before starting.
-
Line up the air valve with the rim and insert it. Use your spoon tool to assist the lift off the tire and the rim where needed. You may spray some water to make it easier to insert. Please ensure that you have a towel to wipe up excess liquid as the motors are susceptible to water damage.
-
Once one side of the tire is over the rim, use your palms and spoon tool to push in the remaining parts. You may massage the tire if it seems uneven on either side.
-
Fill the wheel with air to the recommended psi (between 45 and 50 psi) and install the rotor back on by tightening the six screws using the 4 mm hex key.
-
Before placing the wheel back on the scooter, ensure that the washers line up with the frame on both sides.
-
Push the motor into the frame and screw the motor bolts back in with the 18 mm socket wrench.
-
Ensure that the motor cables emerge from the correct side of the scooter so that you can wind it into the body. Get in front of the tire and see if it lines up with the rest of the scooter. Check for wobble to ensure that the tire is fully secured.
-
Tie the string from earlier to the new motor wires and then tape them. Pull the string at the other end while pushing the cable from the front until the whole cable emerges into the cavity.
-
Remove the tape and string, then ensure that the motor hall pins have the fins sticking up before installing them using the pin tool. Insert each pin one at a time into the motor hall and push them in until they click.
-
Connect the motor hall and the motor cables, matching the colors.
-
Test out the front motor. If it accelerates, organize the controller among the wires and close up the main cavity. Please make sure no wires are pinching.
-
Place the seat on top, line up the screw holes, and use the 5 mm hex key to screw in the seat until it's firm.
-
Wrap the wire cover over the cable starting at the motor and working your way towards the scooter body. Use zip ties to secure the wrap cable to the two slots from earlier.
-
Screw the front caliper back onto the frame using the 5 mm hex key.
-
If there are any scraping sounds coming from the front, try to realign your brakes and check if the disc rotor is bent. If there's a bent on the rotor, slowly turn the wheel until you see it with your own eyes. Then, gently bend the rotor back using your hands.
-
Finally, tighten the brake caliper and rotor and place the nut covers back on.
How to Replace the Controllers
The controllers on your EMOVE RoadRunner electric scooter play a pivotal role in managing and coordinating the functionality of your scooter's motors. The replacement process involves the front motor, which requires a smaller controller, and the rear motor, which uses a larger controller.
Tools
-
5 mm hex key
-
Electrical tape
-
Gloves
-
New controllers
How to Replace the Front Controller
-
Use the 5mm hex key to unscrew the four screws located under the scooter seat.
-
Lift the seat and set it aside.
-
Cut the zip tie holding the wires together using scissors.
-
Locate the smaller controller, usually placed at the front, and remove it.
-
Find the power line and unplug the yellow connectors. Tape up the ends to prevent sparking. For safety, wearing gloves is recommended.
-
Unplug the motor hall connector, followed by the three motor cables. Be sure to pull at the connectors and not the cables.
-
Now, connect your new controller. Start by plugging in the motor hall connector, followed by the three motor cables. Ensure the colors match: yellow to yellow, blue to blue, green to green.
-
Swap each set of wires one at a time to avoid confusion.
-
Unplug the cords with the black connector and plug them into the same colored cords on the new controller. Do this for each set of wires according to the color groups.
-
Remove the old controller, wrap it in plastic, as it may still hold a charge. Avoid placing it on a metal surface.
-
Reconnect the yellow power cords.
-
Test the scooter to ensure that it's working properly. Check the throttle, front and rear motors, turn signals, brake lights, horn, LCD screen, and front lights.
-
Once you've confirmed that all systems are functional, arrange all components neatly, ensuring no pinching of wires.
-
Finally, align the seat with the screw holes and use the 5mm hex key to securely fasten the seat back on.
How to Replace the Rear Controller
The process for replacing the rear controller is identical to the front controller replacement. Follow steps 1-14 as mentioned above. The only difference is in step 4:
Locate the larger controller, typically positioned along the back, and remove it.
How to Replace the Thumb Throttle
The electric scooter throttle controls the speed of the scooter. It may require replacement if it gets worn out, broken, or if the scooter's speed control becomes inconsistent or unresponsive.
Tools
-
3 mm hex key
-
5 mm hex key
-
Scissors
-
Pin removal tool
-
Flexible wire
-
Tape
-
Knife
Steps
-
Using the 5 mm hex key, unscrew the four screws located at the bottom of the seat.
-
Move the seat aside and locate the throttle connector, which has red, green, black, yellow, and blue wires plugged into a white connector.
-
Cut any zip ties in the way and disconnect the throttle wire. Take a reference photo of the connections for later reference.
-
Snip the wire where it will be depinned.
-
Debride the throttle line and gently pull the throttle cable out.
-
Twist and remove the right grip with your hand.
-
Loosen the throttle using the 3 mm hex key, slide it off, and fully remove it from your scooter.
-
Slide your new throttle onto the handlebar and semi-tighten it with the 3 mm hex key.
-
To test the new throttle, pin the wires into the white connector as follows: red to red, yellow to green, and black to black.
-
For the last two wires, yellow and blue, which determine the single and dual motor functions, first try connecting yellow to yellow and blue to blue.
-
Power on your scooter and test both the single and dual motor functions. If the buttons are flipped, swap the yellow to blue and the blue to yellow.
-
Take a picture of the wire orientation and disconnect them from the white connector.
-
Thread a flexible wire through the right tube.
-
Tape the throttle line to your wire and slowly pull it through until it reaches the controller box.
-
Use a knife to lift the locking pins and insert them into the black connector in the same orientation as earlier.
-
Plug it into the white connector and power on your scooter to test that everything functions properly.
-
Organize the wires and place the seat back into its position. Align the seat holes and secure it in place with the 5 mm hex key.
-
Reinsert your grip and fully tighten the throttle.
-
Wrap the braid on the bottom end of your cables a couple of times and push it into the tube, then complete wrapping the braid.
Conclusion
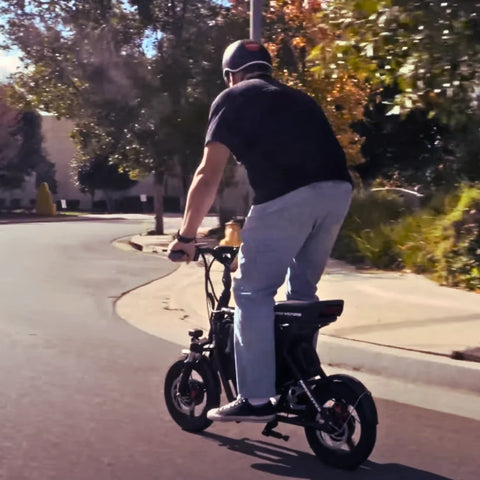
Congratulations on becoming the new owner of the remarkable EMOVE RoadRunner V2 seated electric scooter! It's not just a scooter; it's a trusty companion for all your travel needs. As you embark on your thrilling journeys with the RoadRunner, safety should always be a top priority. Before every ride, conduct a thorough safety check to ensure your scooter is in tip-top condition.
Additionally, don't forget to gear up for your rides. Putting on the right safety equipment, such as a helmet, knee pads, and elbow guards, can make a world of difference in protecting you during unforeseen circumstances. Regular maintenance is key to keeping your RoadRunner V2 running smoothly and reliably. A little care goes a long way in prolonging the life of your scooter.
Check out our YouTube channel for an array of tutorial videos. Our channel is dedicated to providing you with in-depth guides on how to make the most out of your scooter and ensure a safe and enjoyable riding experience. Thank you for being a part of our growing community of riders!